Leverage Turing Intelligence capabilities to integrate AI into your operations, enhance automation, and optimize cloud migration for scalable impact.
Advance foundation model research and improve LLM reasoning, coding, and multimodal capabilities with Turing AGI Advancement.
Access a global network of elite AI professionals through Turing Jobs—vetted experts ready to accelerate your AI initiatives.
FOR DEVELOPERS
How to Install and Create Your First Nuxt.js App

Nuxt.js is a Vue.js framework used for building web apps. It can build a complete Vue.js client-side rendering application and a comprehensive static-generated one. This article will walk you through setting up your first Nuxt.js application. We'll utilize Nuxt's create-nuxt-app utility which enables CLI configuration of the application template. We’ll review it step-by-step, so you can quickly and easily create Nuxt apps.
Table of Contents
Prerequisites
To complete this tutorial, you will need the following:
- A basic understanding of Vue.js.
- Node installed on your computer. You can install Node at nodejs.org. create-nuxt-app requires the latest LTS version installed.
- An NPM package manager. It is included by default in your installation of Node.
- You will need a good code editor to work with the project files. Visual Studio Code is recommended. Visit "code.visualstudio.com" to download it.
We will be going over the following steps to create a Nuxt app:
- Install create-nuxt-app.
- Review the folder/file structure.
- Run the Nuxt application.
Steps to create a Nuxt app
Install create-nuxt-app
Open your terminal or command line on your computer, preferably the VS code terminal (go to View > Terminal). This is where you will use the 'npx' tool. Using 'npx' also ensures that you use the latest version of create-nuxt-app to create your project.
In the terminal, write the command:
npx create-nuxt-app <project-name>
Note: For the purpose of this article, first-nuxt-app is the name of the project. So, use 'npx create-nuxt-app first-nuxt-app'.
After writing the command above, you will get some responses in the form of questions in this sequence:
- Need to install the following packages: create-nuxt-app
Ok to proceed? (y)
Type the letter 'y' and press Enter.
- Project name: (first-nuxt-app)
Next, press the Enter key to confirm the project name.
- Programming language: (Use arrow keys)
❯ JavaScript
TypeScript
Use the up and down arrow keys to navigate the options and then press the Enter key to confirm.
You can choose what programming language to use. Note: JavaScript is selected for this article.
- Package manager: (Use arrow keys)
❯ Yarn
Npm
Select Npm.
- UI framework: (Use arrow keys)
❯ None
Ant Design Vue
BalmUI
Bootstrap Vue
Buefy
Chakra UI
Element
Oruga
Primevue
Tachyons
Tailwind CSS
Windi CSS
Vant
View UI
Vuetify.js
Select None.
- Nuxt.js modules:
◯ Axios - Promise based HTTP client
◯ Progressive Web App (PWA)
◯ Content - Git-based headless CMS
You can select more than one option for this question. To do this, navigate to each option that you want and press the spacebar key to select the option. You can also select all options by pressing the 'a' key.
For this project, select only Axios - Promise based HTTP client.
Linting tools:
◯ ESLint
◯ Prettier
◯ Lint staged files
◯ StyleLint
◯ Commitlint
Select ESLint and Prettier.
ESLint will lint your code on save. Prettier will prettify your code on save.
- Testing framework: (Use arrow keys)
❯ None
Jest
AVA
WebdriverIO
Nightwatch
Select None.
- Rendering mode: (Use arrow keys)
❯ Universal (SSR / SSG)
Single Page App
Select Single Page App.
- Deployment target: (Use arrow keys)
❯ Server (Node.js hosting)
Static (Static/Jamstack hosting)
Select Server (Node.js hosting).
- Development tools:
◯ jsconfig.json (Recommended for VS Code if you're not using typescript)
◯ Semantic Pull Requests
◯ Dependabot (For auto-updating dependencies, GitHub only)
Next, select only jsconfig.json.
- Continuous integration: (Use arrow keys)
❯ None
GitHub Actions (GitHub only)
Travis CI
CircleCI
Select None again.
- Version control system: (Use arrow keys)
❯ Git
None
Finally, select Git.
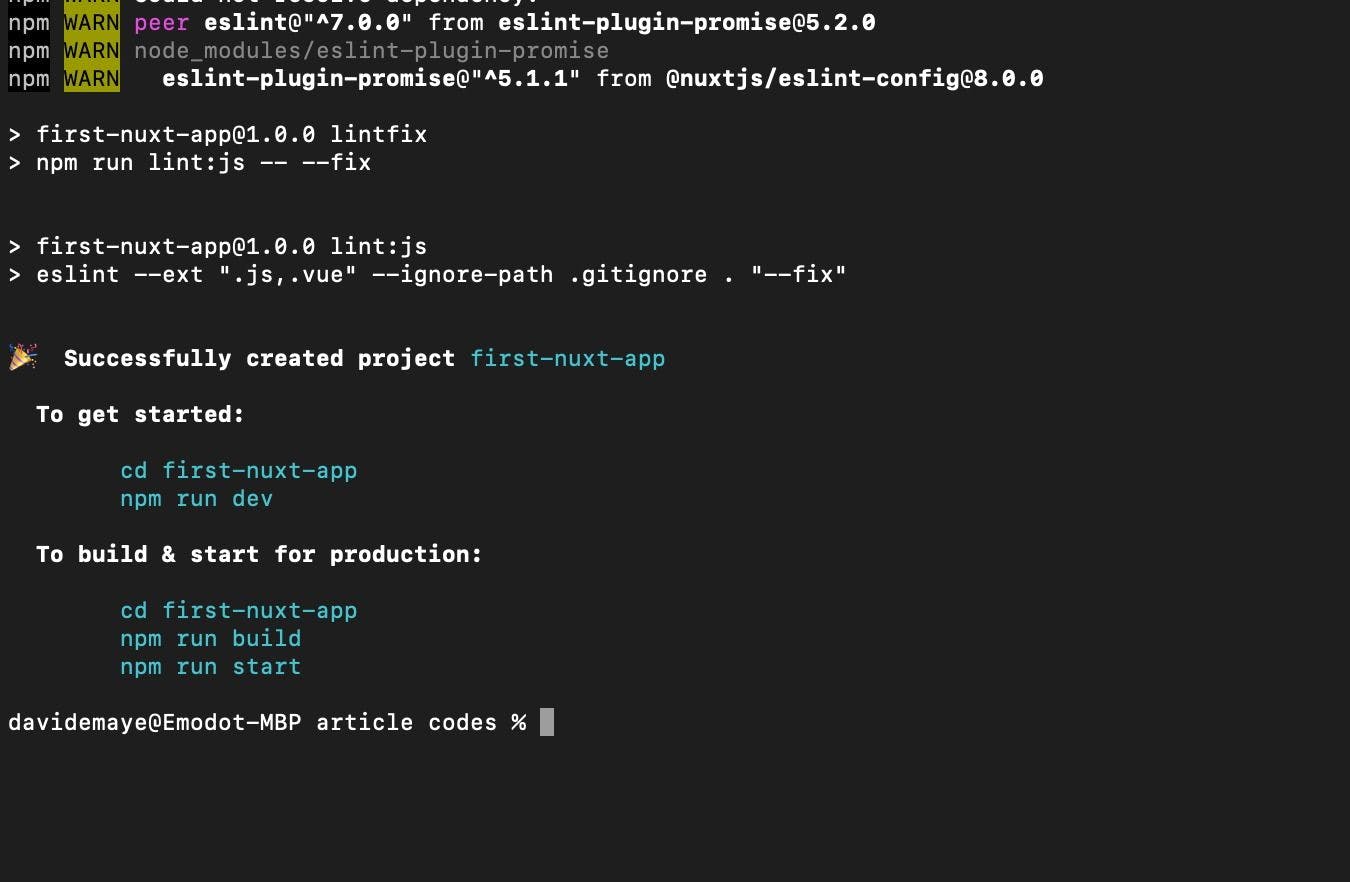
After answering the questions above, all your dependencies will be installed.
You will see this on the terminal once they are installed:
Now, you need to navigate to your project folder using the command below:
cd first-nuxt-app
Review the folder/file structure
Each directory and file is designed to help with a different aspect of the project. We will talk about the main directories. But first, let's see what your project structure looks like after creating the project.
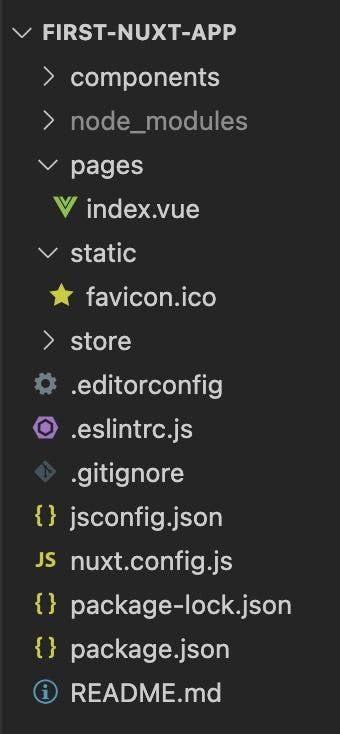
- Components
Components are what make up the different parts of your page. They can be reused and imported into pages, layouts, and other components. Those that you use in your project can be stored in this directory.
- Pages
One of the most important directories in your project is the pages directory since any ".vue" file added to it generates a route automatically. You can create pages for your Nuxt.js app here. You can also create new folders inside the page directory to create nested pages.
- Static
The static folder in Nuxt.js houses static files that you can call from your application. It stores static files that will not change, like example.txt, sitemaps, and favicons.
- Store
The store directory houses all of your Vuex files. Vuex is a state management pattern and library for Vue.js applications. It serves as a centralized store for all the components in an application, with rules ensuring that the state can only be mutated predictably.
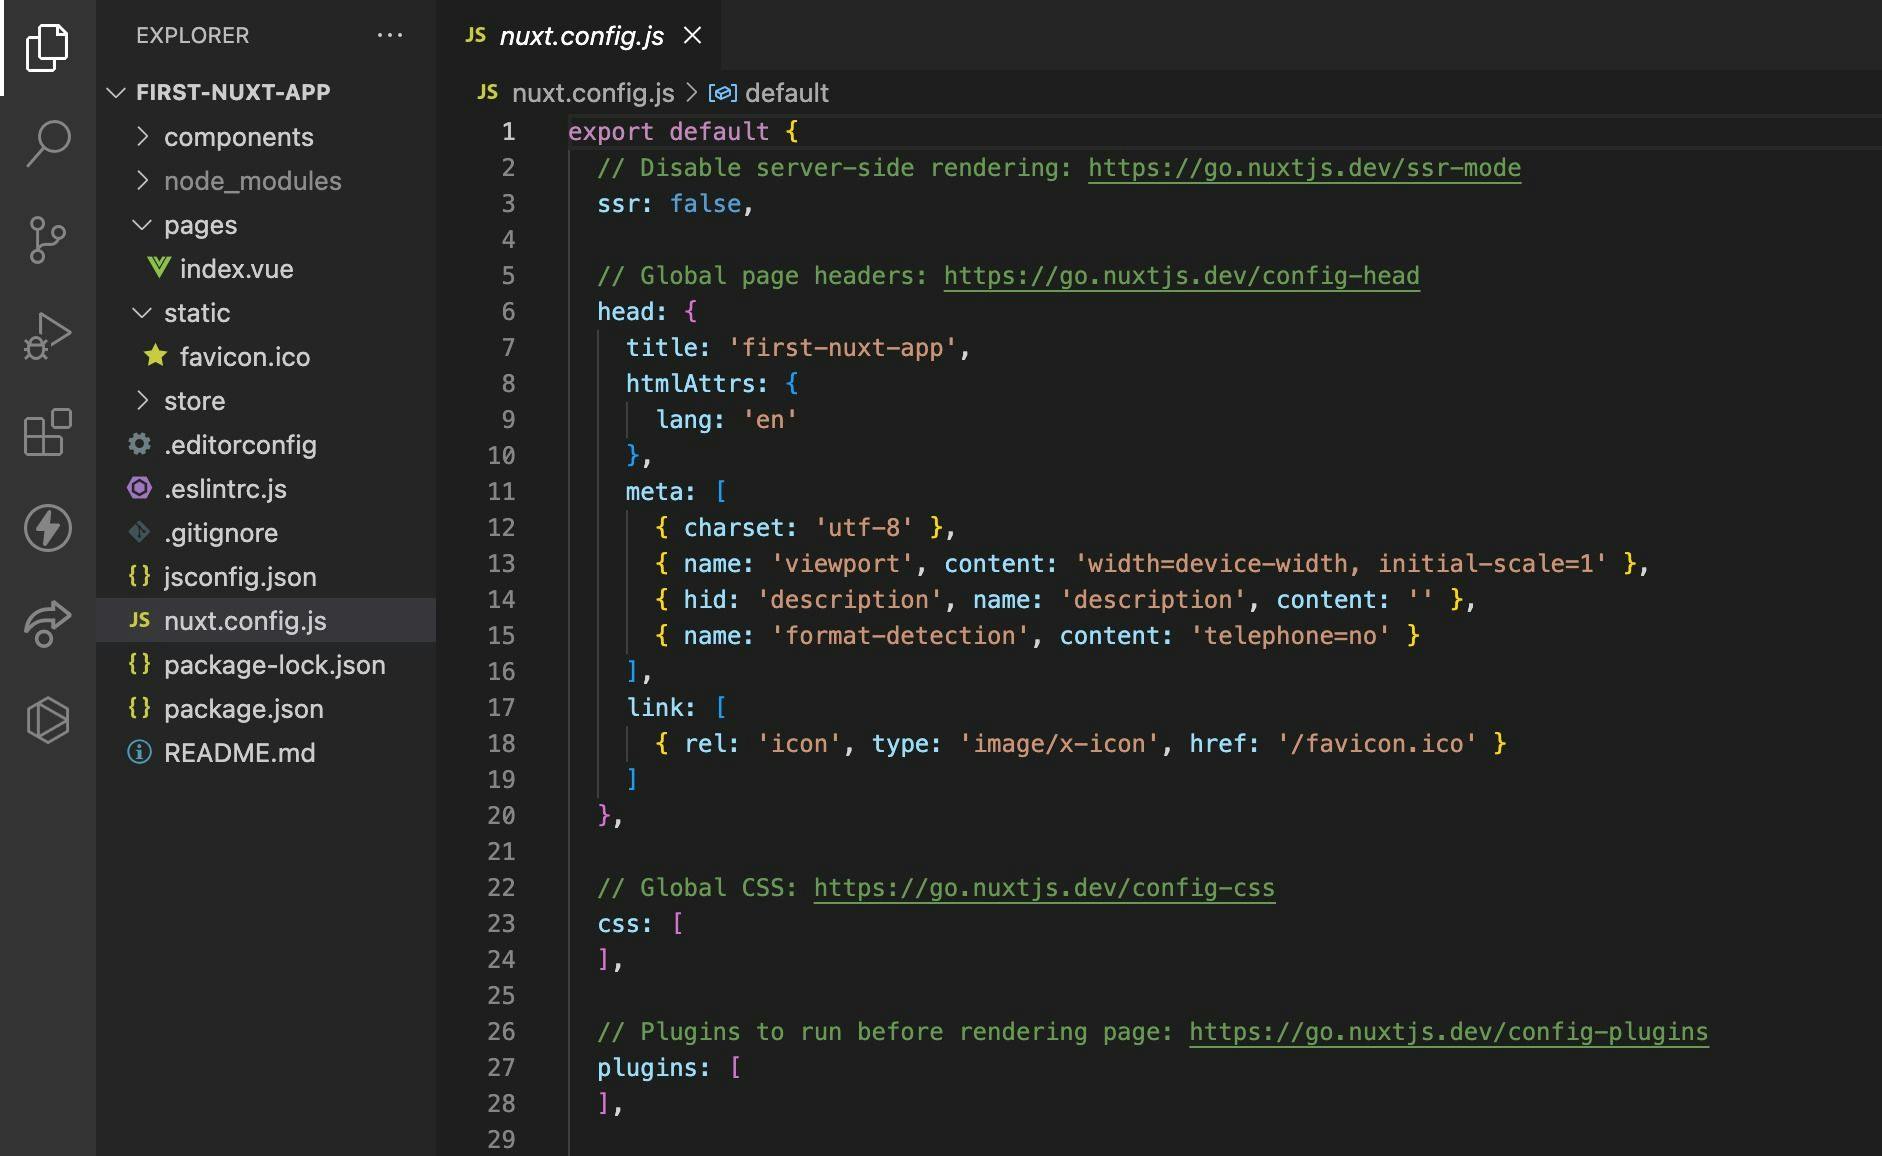
- nuxt.config.js
The nuxt.config.js file is an essential part of your project. It houses your Nuxt.js custom configuration and also gives you the ability to configure the application. These configuration options include, among other things, middleware, plugins, authentication, modules, and even API routes.
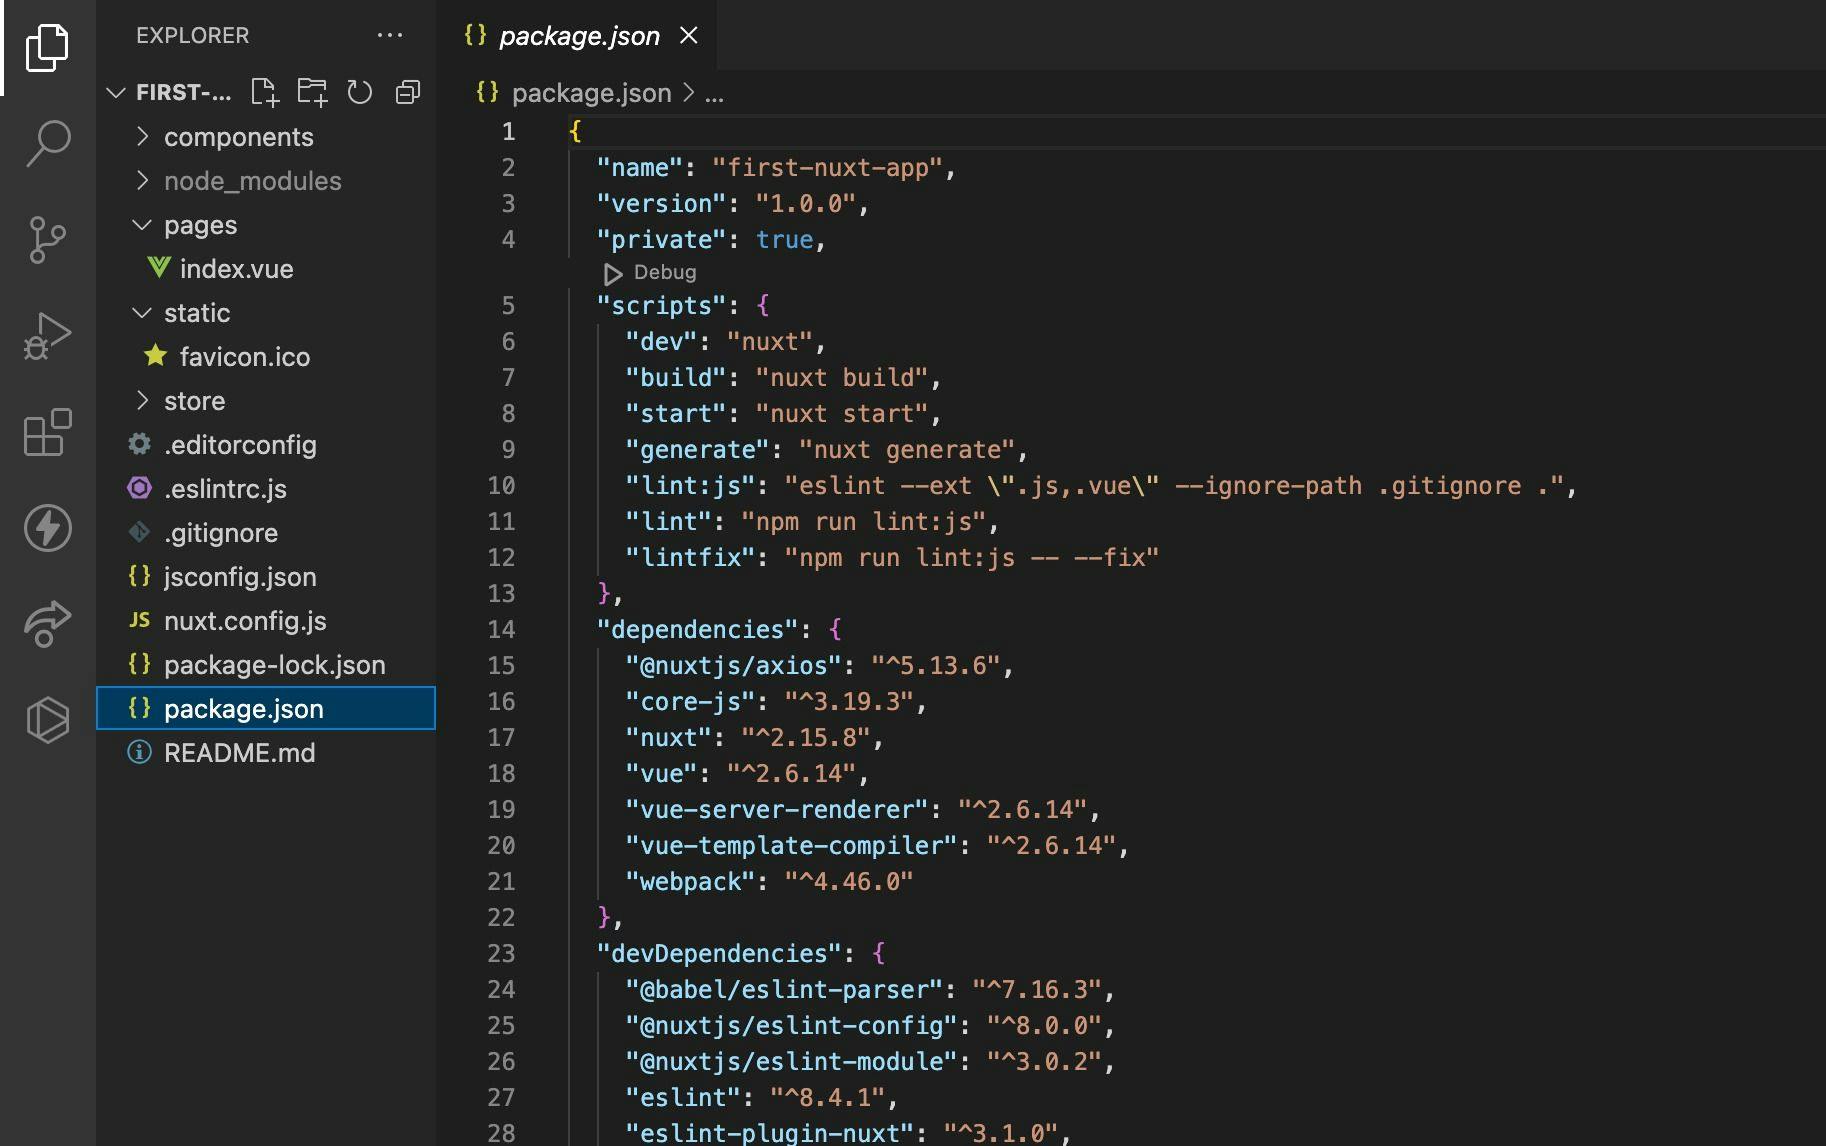
- packages.json
The packages.json file contains all the dependencies of your Nuxt.js app.
Some folders used to be part of the folder structure but have been omitted in the recent Nuxt.js installation updates. However, you can create them.
The folders are:
- Assets
- Layouts
- Plugins
- Middleware
After creating these folders, this is how the folder structure will look:

- Assets
The assets folder houses different types of assets that are used in your app, such as images, fonts, audio files, logos, and styles.
- Layouts
When a new project is created, the Nuxt CLI will create a single layout: default .vue. For many applications, more than a single layout file is needed so that you can set up numerous layouts based on your needs. For example, admin layout, login layout, and dashboard layout. These can be reused on different pages to handle their look and feel.
- Plugins
You can globally register Vue libraries in the main.js section of any typical Vue project. However, because this file is omitted from your Nuxt.js application, the plugins directory is now responsible for fulfilling this obligation.
When using 'Vue.use', you should create a file in the plugins directory and include the file's path in nuxt.config.js.
- Middleware
Middleware serves as a guard between routes in your application, enabling users to restrict access to specific areas of your website to users who meet a specified set of requirements.
Run the Nuxt.js application
You can use this command to run the Nuxt.js project into development mode:
npm run dev
This is the response you will get:
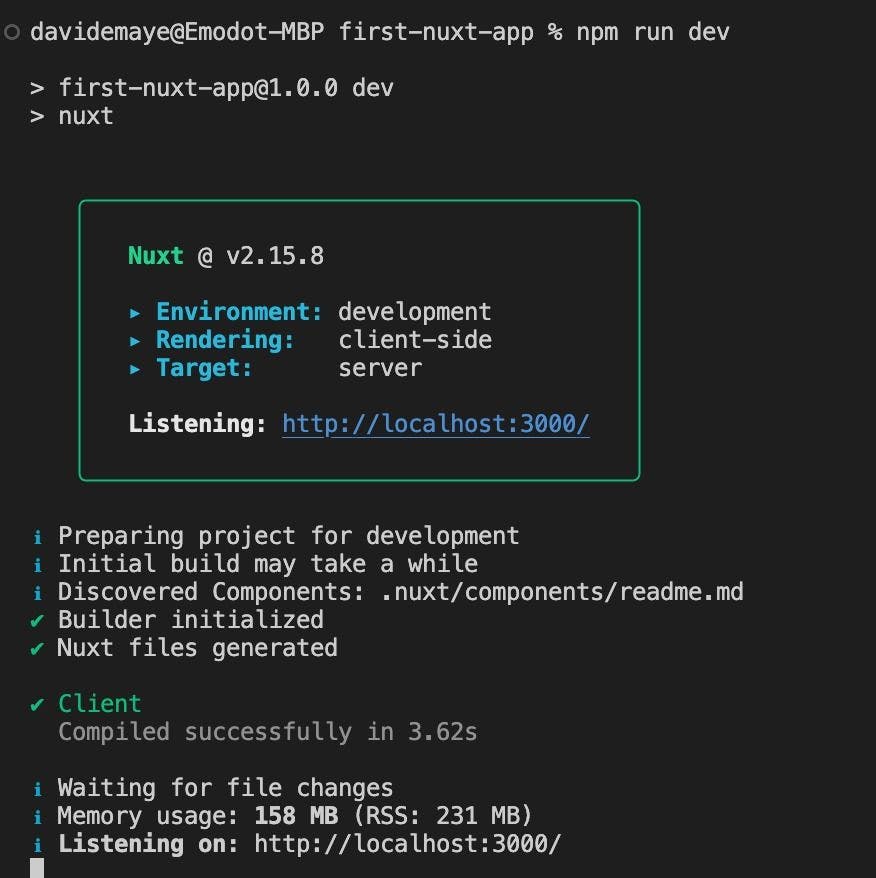
When you run your project, the development server will start on localhost:3000. You can go to your browser to see your Nuxt app.
This is what it will look like:

And there you have it - a simple guide on how to create a Nuxt app. Practice the steps and review your process until you become properly familiar with it.
Author

David Emaye
David Emaye is a Frontend Developer and Technical writer who loves learning, teaching, and building web tools and applications. He has more than two years of commercial experience providing frontend development, producing high-quality, responsive websites and exceptional user experience.
Frequently Asked Questions

Press

Blog
